As you can tell I love making cakes and what I like the most is getting challenged by my own family. Having 5 kids gives me the chance to get creative and do research for new techniques. Although I teach myself everything I know, sometimes I do watch YouTube videos and learn some more. It is all very fun and exciting. My son just turned 11 and he is into Fantasy, he loves anything that has to do with magic, hidden worlds, dragons, knights.... you name it, he loves it.
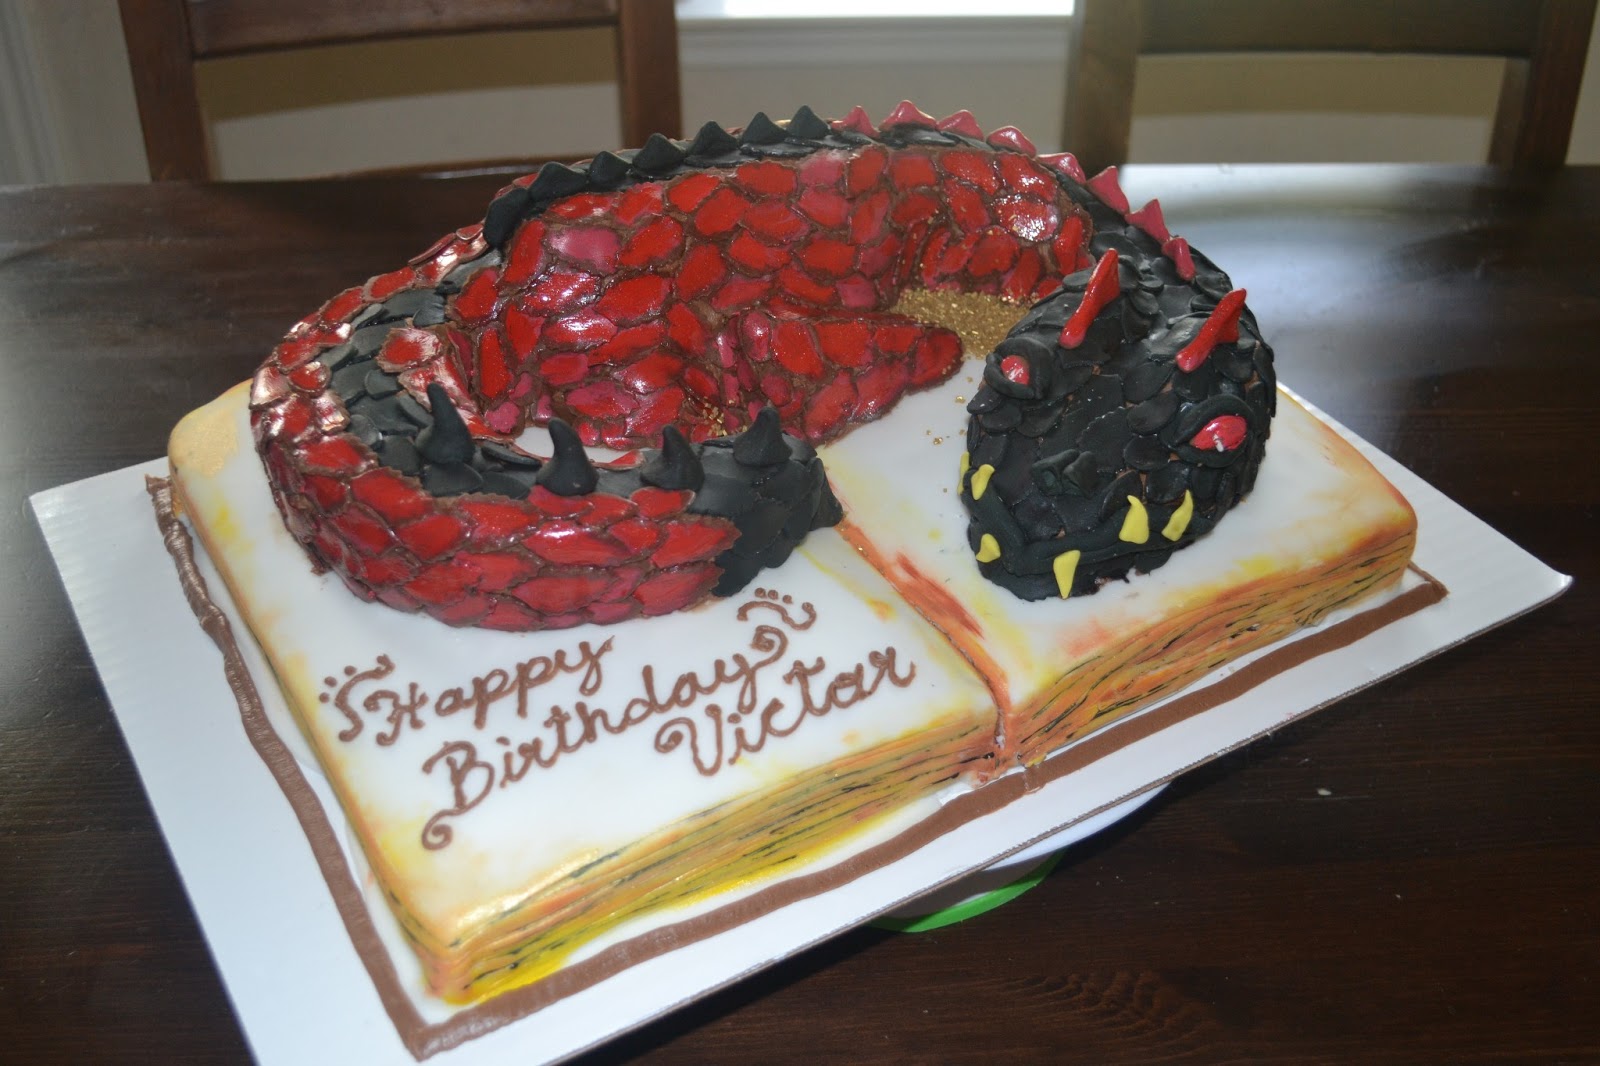
I came up with the idea of putting a dragon on top of a book because he loves reading and likes dragons and then did a search on Google and found that my idea was not so original. But then they had some cool ideas and there was one particular cake that I liked, so I kind of copied their style. There was no tutorial on how to do the cake so here is mine.
I MUST WARN YOU- LOTS OF PICS FOR THE STEP BY STEP INSTRUCTIONS-
First you start by shaping the bottom cake (full sheet size). I turned my cake upside down and made an indentation all along the middle part so when I turned it over it had the shape of an open book. It is done that way so the smooth part is on the top.
Then you ice the entire cake, it doesn't have to be perfect just smooth enough.
Then you cut the parts for your dragon, mine was a more or less 3D cake so I wanted his back shaped and had to do different layers for it.
Next you cover it with fondant, just make sure all the crumbs are off the cake (I forgot that part and the crumbs show...)
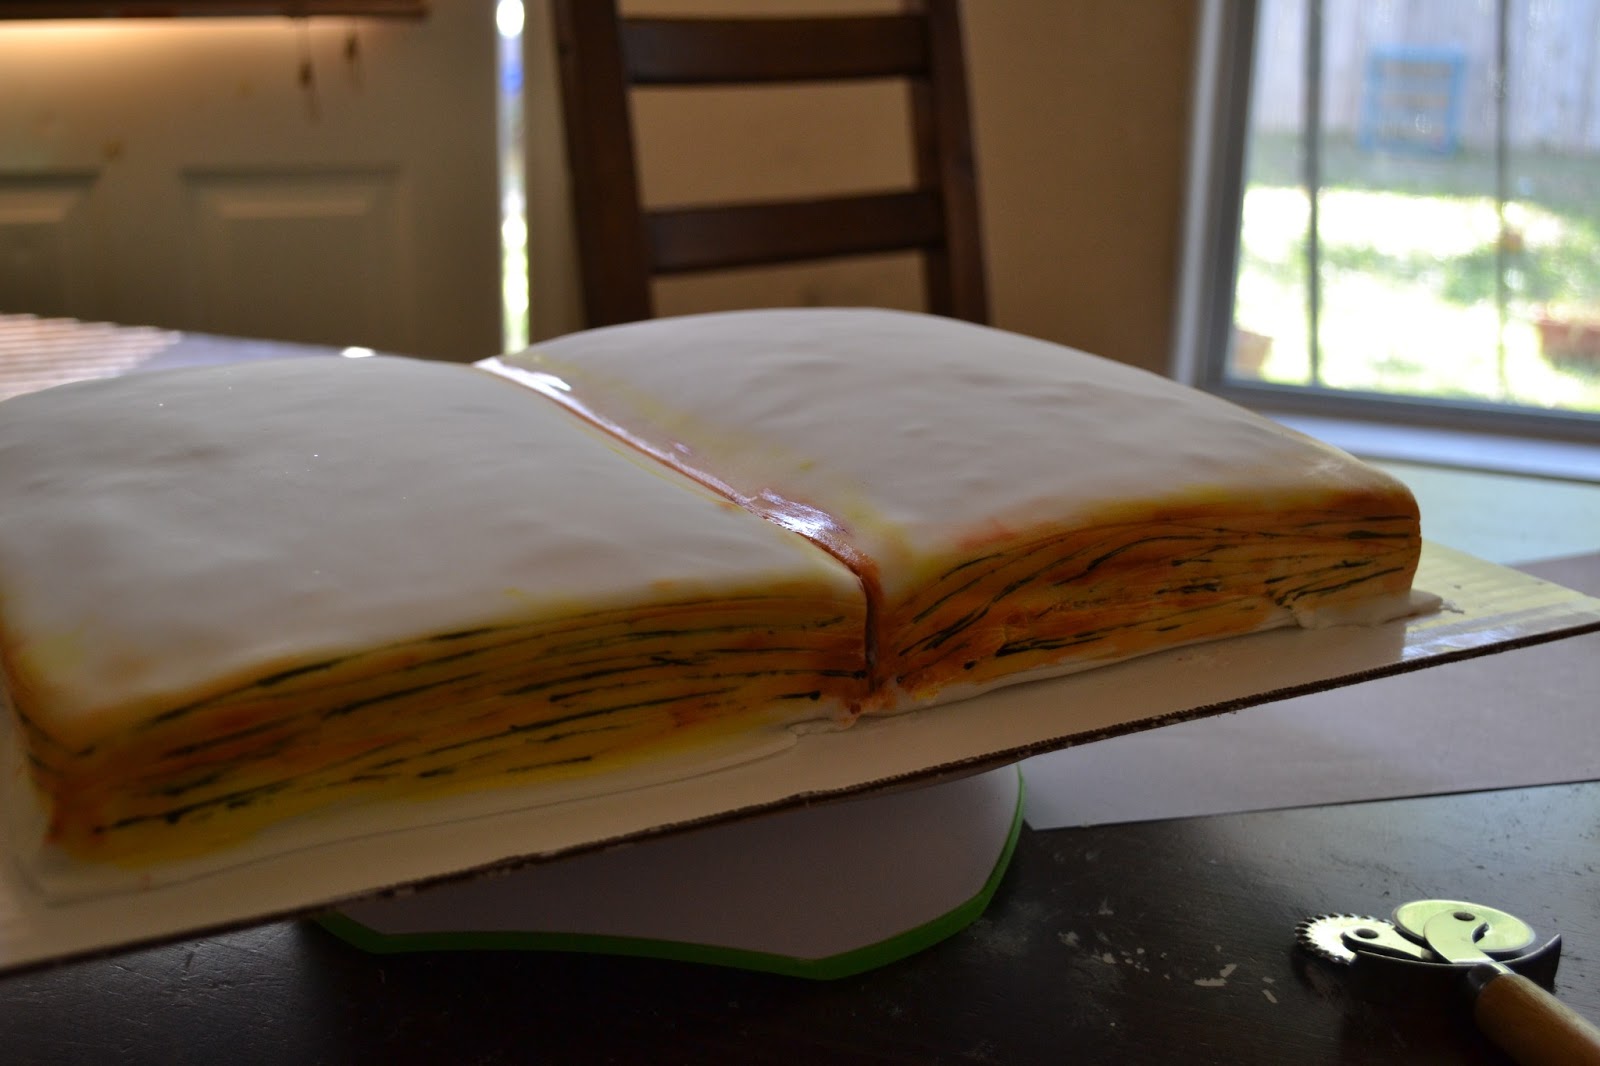
Next you make the mark for the pages on the book, on every single side of the book.
It should look like this.
Next I mix my colors to make the pages look like it is an old book. I mixed yellow with orange and a dot of white, also some rust color and white to do add aging.
Toothpics are great for mixing and then I used a clean and new make up sponge to go over the cake.
You cover all four sides with the base color (yellow).
Then you do the same with the darker color.
It should look something like this.

Next mix some gold luster dust (can be found at any store that sales cake supplies) and a few drops of lime juice. Add the juice until you get the consistency that you want. Not too runny and not too thick.

Cover all sides of the book again with a brush. Then use a toohpic with black coloring to mark all the lines that you previously made on the cake so you can give a better look. A little coloring goes a long way.
And it should look like this. The gold luster gives the book a more elegant finish which I like a lot and it looks so fancy.
Then you move on to reshaping the dragon, in this final stage is when you cut each individual piece and you give it the dimension that you are looking for, the tail needed to be lower and the back a little bit more raised. I added the legs and long neck and gave the head a better shape.
When you have the shape that you want then you can start icing the pieces and adding them to the top of the book. Do this one by one and using the icing as glue... the icing must be a little thin, if it is too think it just wont work.
Since I wanted the dragon to be dark I used buttercream icing but added dark cocoa to it, it gives it a nice taste.
As you can see I just add each piece where it belongs with a litte bit of frosting.
Do that until all your pieces are in place.
Then proceed to ice the entire dragon, make sure that the icing stays on the dragon only and if you make a mistake and you drop icing on the white fondant it's OK you can wipe it off but do it right away so it doesn't stain.
When you are done icing the cake brush away any crumbs, very important to do that :)
Then start adding all the scales that you previously cut for your dragon. I would highly recommend to cut them way ahead of time but keep them in a plastic bag so they are nice and soft, if you leave them out they harden and don't work for the look you are trying to achieve.
Use a brush with a little bit of water to glue the scales on top of each other and work your way up and fast because they do dry super fast.
My design had darker scales int he middle, tail and head so I did those first and then filled it all in with the rest of the brown scales but I guess you could do it the other way around too.
I did run out of scales so I had to cut some extra. I used a leaf shape cutter and also an flower petal for the little ones, they worked great.
After I cover the cake with all the scales I went over with the brush slightly wet and gave each individual scale a little bit of shine. The last part is to add the details like the eyes, mouth, ears and nose.
I thought I was done but my husband informed me that there are no brown dragons so I had to paint over every single brown scale and turned it red. It looked better in the end. As a special feature I used some Wilton glittery gel all over the red scales and it gave it a more realistic look.
I don't have the best handwriting but I think it looks good enough. I think calligraphy lessons might be in my future.
And there you have it, in this close up you can see the gold accent on the pages. I think it is a successful attempt.


No comments:
Post a Comment